
This article explains how I built my e-commerce website, relevant for Pakistan residents wanting to start their own e-commerce site without coding skills.
1. Why I Built My Website
2. The Process of Registering a Company
3. Meeting The Following E-commerce Platform Requirements
– Merchant Account
– Registering a Domain Name
– Selecting a CMS
– Choosing a Hosting Service
– Picking a Website Theme
– WordPress Plugins
– Payment Gateway
Why Did I Build My Website?
Reason #1
Understanding that assuming mutual respect develops naturally over time in all situations is a mistake took me a considerable amount of time. I initially believed that better education and close working relationships were the primary contributors to understanding, but I later realized that several other factors come into play. These factors include individual differences, personal attitudes, behaviors, experiences, and communication skills, all of which significantly impact how well individuals connect and comprehend each other.
My experiences of consistently feeling misunderstood, whether it was within the professional sphere, among friends, or even within my family, left me fatigued. Consequently, I resolved to take action. I chose to construct a platform that could genuinely mirror my identity, principles, values, and non-negotiable beliefs. Additionally, I aimed to create a distance between myself and individuals whose core values didn’t align with mine, especially in the context of music and collaborations.
This was the major reason why I chose to build my website.
Reason #2
I could just opted to use social media to represent myself instead of building a platform from scratch, although I do use social media for this purpose, but our social media accounts are not truly under our control, they can be easily hacked, deleted or suspended by the platform.
You will hear many stories on youtube from established you-tubers how their accounts got suspended and they had to go through painstaking procedures to get the accounts back or they couldn’t recover the accounts at all. So your website is your own platform and you are 100% in control. Even in the event of a security breach, issues can be rectified, offering a reassuring sense of ownership and control.
Reason #3
I aimed to exclusively sell my music through my website while also utilising it for conducting interviews, creating educational instructional content, and maintaining a blog. So I wasn’t just thinking about creating a website that just showcases my profile, I aspired to create a comprehensive e-commerce platform. I believe as a musician this ambition sets me apart from everybody else in the country.
My target audience is global in scope. I am aware of the fact that very few people buy music these days, especially Pakistanis have a habit of getting everything for free. I don’t share my music for free unless it serves a specific purpose like charity or it recovers its cost through the purchases.
Hence, my target audience comprises those who genuinely appreciate the value of someone’s work and time, whether it pertains to an art form or any other domain.
Reason # 4
Instead of keeping content exclusive to my website, why not spread it across all music streaming platforms, like everybody else is doing?
I have decided to not use music services who’s main purpose is to lure artists in their trap of selling the idea of providing global reach and exploiting their music for their own benefit rather than the artist.Many musicians who utilise these streaming platforms lament their inadequate compensation, yet they continue to bolster these services by participating. These platforms are, in part, responsible for the devaluation of music.
My belief is that music streaming platforms should be restricted to providing song previews, essentially serving as promotional billboards for artists. Listeners who appreciate the preview can then make direct purchases of the track from the artist’s website. Although this concept may appear somewhat ambitious, it is indeed feasible to implement this model. Regrettably, the resolve to address this issue is currently lacking.
It’s worth noting that serious YouTubers who produce free content on YouTube consistently promote their own websites to offer exclusive content. A website is also part of the business equation that helps you run your business successfully.
Registering My Company for an E-commerce Platform:
There are a few options available for registering a company as a distinct business entity and I opted for a sole proprietorship.
1. Sole Proprietorship
2. Partnership
3. Private Limited Company
4. Single Member Company (SMC)
5. Public Limited Company
6. Limited Liability Partnership (LLP)
7. Foreign Company
Sole proprietorship :
It is a business owned and managed by a single individual. It’s the simplest and most straightforward way to start a business. The owner has full control over decision-making and operations. You can collaborate with others in various ways, such as hiring employees, working with freelancers, or forming contractual relationships with other businesses. You are your own boss and have the complete freedom to do everything the way you want it. This option is particularly suitable for small businesses.
Legal process & requirements:
I chose a name for my company i.e HOD STUDIO and went to the Secretariat situated in Sadar Cantt Lahore. You will find many documentation assistants over there, just go to one of them and they will assist you with the process and they charge a very nominal fee for that.
The first thing is to get a stamp paper and fill in the details about your company, the assistant will do it for you, the stamp paper costs between 50 Rs to 500 Rs. Ask the assistant which one you should get. The documentation process took less than an hour to complete.
Next you will have to get your Business cards and a stamp that has your studios name on it. You can get them made from a print shop.
Requirements For Building Your e-commerce Website :
Merchant Account
I will clarify the significance of each category and conclude by presenting a step-by-step method for accomplishing this.
Merchant Account
To establish an e-commerce website for online purchases, it’s imperative to acquire a merchant account from a local bank. You cannot utilize your personal account for this purpose; a dedicated merchant account is a prerequisite to apply for a payment gateway for your online e-commerce store.
When visiting the bank, ensure you bring the essential documents that substantiate your business, including business cards, a business stamp, and be prepared for the possibility of requiring a signature from an 18th-grade government official on your provided documents.
Initially, my preference was to choose a nearby bank, which led me to Meezan Bank. However, my request to open a merchant account was promptly declined once they learned about my profession. They held the belief that music was “HARAM,” thus not aligning with their policy to support artists and musicians.
Subsequently, I approached either Allied Bank or UBL, both of which had specific requirements for business authentication. They requested photographic evidence of the business location, including an outdoor signboard for verification. Unfortunately, I couldn’t comply with these requirements, as my home studio lacked a commercial signboard outside.
Finally, I turned to MCB as my third option, and they readily accepted my request. The process proceeded smoothly, albeit taking a few weeks to complete.
It’s advisable to initiate the application for a merchant account as your initial step because, while the bank processes the merchant account request, you can concurrently commence building your website.
Domain Registration
A domain name serves as the URL for your website, essentially the address users utilize to access your site. To obtain one, you’ll need to utilize an online domain registration service, such as Domain.com.
Simply navigate to the website and select a memorable name that directly relates to your website’s content. For instance, names like lights.com, lights.co, or lights.store are examples of suitable choices. The domain registration service will verify the name’s availability; should it already be in use, an alternative name will be necessary. If your chosen domain name is available, you will be prompted to make an annual payment to secure it. Costs can vary, starting at $2 and increasing depending on the specific domain type you desire (e.g., .com, .co, .store, .io). It’s worth noting that .com is the most commonly utilized domain extension.
Additionally, you have the option to register a domain when purchasing a hosting package from a web hosting service.
Selecting a Content Management System (CMS)






A content management system (CMS) serves as the foundational platform for creating and managing a website, even if you lack coding skills. Numerous options are available, but the most widely recognized choice is WordPress. Its popularity stems from its robust customisation capabilities and the abundant availability of troubleshooting resources.
Previously, I experimented with Wix, which is an excellent choice for beginners who wish to avoid extensive customisation. When I utilized Wix in 2016, it had limitations in certain areas, such as the inability to offer buyers the option to set their own prices or integrate a local payment gateway like Jazz Cash. Nonetheless, Wix boasts user-friendliness, with minimal concerns about security breaches or server performance. To incorporate specific functionalities, you would need to purchase plugins if you opt for wordpress to build your site. However, Wix does not support the integration of third-party plugins; instead, you must contact them and pay for additional features, which can become costly.
In contrast, WordPress benefits from an active community of plugin developers who continuously create and update a wide array of plugins. The primary drawback of relying on these plugins is the necessity to verify their compatibility with your website. If you’ve installed over 20 plugins and, for any reason, one of them disrupts the site’s functionality, you must troubleshoot by disabling them one by one, a process that can be time-consuming. If you possess the time, patience, and enthusiasm to engage in ongoing learning, WordPress presents an excellent choice. Alternatively, for e-commerce endeavours, you may consider platforms like Wix or Shopify.
It’s worth noting that WordPress is a freely available CMS that undergoes regular updates to enhance its functionality. These are a few names of the most popular CMS available.
Click the links below to learn more about these CMS platforms.
Selecting a Hosting Provider
After settling on a CMS, the next step involves conducting some research to identify a reputable hosting provider. Think of a hosting provider as a service that allows you to install your chosen CMS and construct your website—it’s akin to acquiring a piece of land for lease upon which you’ll build your shop. Payment to the service provider typically occurs on a monthly or yearly basis, depending on your selected package.
With hosting services, your website remains on their servers for the duration of your package. If you’re satisfied with the hosting service, you can renew your package before it expires. Alternatively, you have the option to migrate to a different hosting service. A reliable hosting service is characterized by responsive customer support, smoothly running servers boasting a 99% uptime rate, and a variety of package options.
After using Wix for a couple of years, I opted for Vibra Host as my hosting provider for a three-year term. I took advantage of their 60% discount during Black Friday deals to purchase their WordPress shared plan. While their customer service was commendable, I encountered performance issues with the WordPress backend. It gradually slowed down to a point where I made the decision to switch to another hosting provider.
After trying out Wix, Vibra Host and iBrave I have switched to HOSTINGER, and I’m genuinely impressed by its speed and reliability!
I took advantage of their yearly discounts and chose a 4 year deal,
If you are looking for a great webhosting service for your website, then I would highly recommend trying this one.
Use the following referral link to get a 20% discount.
H O S T I N G E R – 20% DISCOUNT DEAL! – Click Here
Selecting a Website Theme
A website theme encompasses all the essential pages needed to construct a website, including a homepage, a contact page, an about page, a shop page, a product page, a blog page, a checkout page, and a cart page. These pages are pre-coded to fulfill their specific functions, allowing you to modify their design or add content without the need for coding knowledge. You can accomplish this through the website editor provided within WordPress.
Numerous website themes are available on the internet, with Envato.com being an excellent resource for discovering appealing options for WordPress website themes.
Typically, everything you acquire to build your website, such as a hosting service, website themes, WordPress plugins, SSL certificates, and more, comes with a renewable license. This means that once the license expires, you must make another payment to access customer support and updates. In the case of Wix or Shopify, you simply pay for your monthly or yearly subscription or any additional services you’ve added to your hosting plan to obtain specific functionalities.
I personally obtained a lifetime deal from Blocksy themes, a provider known for offering outstanding services and products. If you’re interested in purchasing their annual or lifetime license for a single or multiple sites, you can click on this link.

Click here to buy blocksy theme deal
WordPress Plugins
By default, your WordPress theme provides essential functionality, allowing you to present your content as desired. However, if you wish to enable features such as donation collections, monthly or yearly subscriptions, the option for clients to set their own price for specific services or products, or restrict certain products to specific customers, you’ll require specialized plugins. Many developers offer free WordPress plugins that come with some limitations but perform just as effectively as their paid counterparts. To make an informed choice, read reviews and conduct research on the plugins you intend to acquire, considering that there are approximately 60,000 WordPress plugins available.
Once you’ve downloaded the necessary plugins, it’s important to test them. If, after installation, a plugin disrupts your site’s functionality, it suggests compatibility issues with your theme, necessitating the search for an alternative. Evaluating plugins in conjunction with your theme can be a time-consuming process. However, once you’ve identified the plugins that suit your needs, activate them and proceed to the next step.
Acquiring an SSL Certificate
An SSL certificate is a necessity for an e-commerce website, serving as verification of its legitimacy as a business entity for online shopping. Multiple types of SSL certificates are available for purchase, typically necessitating annual renewal. Prices for SSL certificates vary, with the most affordable options starting at approximately $17 and potentially reaching up to $1,000 annually. It’s worth noting that certain hosting services offer complimentary SSL certificates, and HOSTINGER is one such provider that offers a free SSL certificate.
Payment Gateway
Once your merchant account is ready and your website is ready, you can now apply for a payment gateway. A payment gateway is a service provider that acts as a bridge between your website and your banks merchant account, when someone buys something on your website the payment goes directly to the payment gateway service provider and after a week or so, it is transferred to your merchant account. A payment gateway guarantees secure and seamless processing of digital payments. Signing up with a payment gateway provider needs all the necessary documents to be submitted to them and that can be done online.
They will check your website and make sure your website has a valid Privacy Policy, Refund or Return Policy and Terms and Conditions page and a valid SSL certificate if you don’t have these pages then they will ask you to create it first.
Many payment gateway providers charge for the following
1 – Setup fee
2 – Recurring yearly fee
3 – Merchant Discount Rate
This is a list of some popular local companies / banks that offer integrating their payment gateway.
- JazzCash
- UBL Omni
- EasyPaisa
- HBL Payment Gateway
- MobiCash
- FonePay
- Keenu
- PayPro
- ePay Punjab
- 2Checkout (Verifone)
- xpay
I opted for PayPro, a relatively new service in 2017 that was rapidly expanding. I registered with them, and while they charged me a setup fee and initially waived yearly fees, they implemented a 3.10% Merchant Discount Rate (MDR) along with a 16% FED for each transaction.
It’s worth noting that they may now also charge a recurring yearly fee, so it’s crucial to select a service provider that aligns with your requirements and ensures you can manage the annual costs.
Additionally, I integrated the JazzCash payment gateway with my website. This process took approximately six months to complete, and I had to make several visits to their bank’s office to keep it on their radar. While their initial progress was slow, once the integration was finalized, communication improved somewhat through email. Recently, they have established a dedicated department to address payment gateway issues.
I would like to extend my gratitude to my friend Junaid Khan, who played a crucial role in connecting me with the individuals who assisted in integrating JazzCash. Prior to that, my attempts to contact JazzCash through their website had gone unanswered.
I also attempted to reach out to EasyPaisa through their website, but, regrettably, they did not respond to my emails. After a payment gateway service provider approves your application, they will provide a downloadable payment gateway plugin for your website. They will also provide the necessary details for configuring and activating the plugin on your WordPress website. It’s important to note that the plugin is designed exclusively for your website, and if you make any changes to your website’s domain address, you must inform your payment gateway service provider.
Step by step procedure :
- Register your company.
- Apply for the merchant account.
- Choose a web hosting service and register your domain or go to Domain.com and register it.
- Choose a web hosting package.
- Buy an SSL certificate through the hosting service or just use the free SSL if they provide one, if you buy the certificate it will get installed within 30 minutes automatically, the free certificate you will have to install it yourself. You can easily do it using their documentation provided by the hosting service.
- After purchasing the package you will be able to access your user dashboard, from there you can install wordpress using the one click installer.

- After the wordpress is installed now you can access the wordpress dashboard, this is the backend of your website where you will create and modify pages, posts, install / uninstall themes and plugins, create products to sell and a lot more.
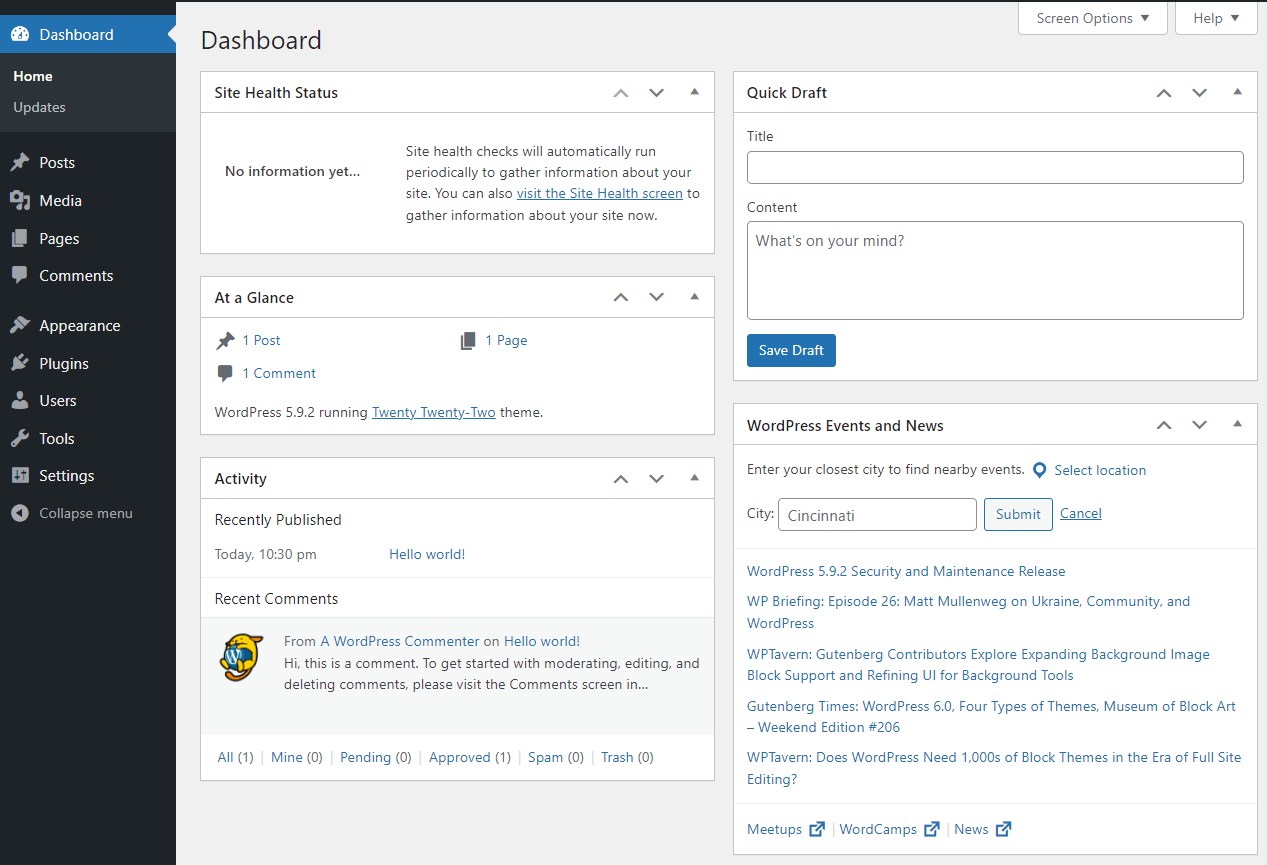
- Get a website theme, the wordpress comes with free website templates, you can use those if you want but if you have found a theme template that you really like then you can install it from the wordpress dashboard.
- Once the theme is installed, click on plugins on the left side of the pane and search the name of the plugin you are looking for. If there is a specific plugin that you don’t find in this search, you will have to get it from the developers page, download it from there and manually install it from the wordpress / plugin section.
- After each installation you will be asked to activate the plugin. So activate them right after the install or click on plugins to see the list of plugins installed. You can activate or deactivate the plugins from here.
- There is a particular plugin called Woocommerce that is required to enable a wordpress website turn from a normal website to an e-commerce platform. It’s completely free and now it’s time to download and install it.
- Download the payment gateway plugin provided by your service provider and install it. You will receive specific details from your plugin provider to setup the plugin.
- Create products from the products section on the left side of the pane (product section appears when the woocommerce plugin is installed).
- Now do some final tests by creating a login from the front end of your website, select a product for purchase and at the checkout use your debit or credit card. If everything is setup correctly the checkout page will redirect you to a secure payment page of your gateway service provider. This is completely normal and this is where you enter your card details and complete the payment process. Once the payment is successful you will be redirected to the website and a payment successful message will appear.
I hope you have found this information helpful, please don’t hesitate to ask me any questions or contact me directly for a one to one or in person session for guidance. I do charge for my sessions, you can click on this link to book your session.


That’s some really precious information and very well elaborated. Many Thanks!